


On this page
A countertop is one of the most visible and expensive surfaces in a home, and one of the least forgiving. A chip near the sink, a seam that shows more than expected, a hairline crack at a cutout, or a color that looks different from the sample can all lead to a callback. Because the surface is handled by several people before it reaches the kitchen, the first question is rarely “what happened?” It is “who is responsible?”
A clear photo record answers that question. When every stage is documented, from the empty cabinets to the finished slab, a fabricator or installer can show what was approved, what was delivered, how it was installed, and how it looked when the crew left.
This guide covers what to photograph at each stage of a countertop project, how to keep the photos organized, and how to turn them into proof you can share with customers, designers, and general contractors.
Why Countertop Jobs Need Careful Documentation
Several features of countertop work make disputes more likely than on many other jobs.
Many hands, many handoffs. A project may involve a sales rep, a templater, a fabrication shop, a delivery crew, and an installer. Damage can occur at any point, and without records it is hard to say where.
Natural stone varies. Veining, color, and pattern differ from slab to slab and across a single slab. Customers who approve a sample or a photo may expect something different when it is installed.
Fragile at the wrong moments. Cutouts, seams, and thin sections near sinks and cooktops are common crack points during handling and installation.
Everything depends on what is underneath. Cabinets that are not level or properly supported can cause problems that appear weeks or months later and are blamed on the countertop.
High-value, high-visibility surfaces. Small flaws are noticed immediately, and customers photograph them.
A consistent record protects the business at each of these points. BlitzzCam is built for this kind of verification: every photo is stamped with GPS and time at capture and saved to the right job. You can see how it supports stone and countertop crews on the BlitzzCam stone and countertops page.
The Seven Stages of a Countertop Photo Record
Think of the project as seven stages. Each has a short set of photos that together tell the full story.
Stage 1: The kitchen before work begins
Before the template appointment or any installation, photograph the space as it is.
- Wide shots of the kitchen from each doorway and corner
- Existing countertops, backsplash, sink, cooktop, and appliances
- Cabinet fronts, doors, and drawers, especially any existing damage
- Walls, flooring, and trim near the work area
- Existing countertop edges, seams, and overhangs
These photos establish the starting condition and protect you from claims about damage that was already present, such as scratches on cabinets or floors.
Stage 2: Cabinets and site readiness at templating
Template accuracy depends on the site. Document the conditions your measurements are based on.
- Cabinets in place, with level readings visible where possible
- Gaps, uneven floors, or walls that are out of square
- Sink and cooktop models or specification sheets, with the model number visible
- Faucet locations and appliance positions
- The template itself in place on the cabinets, from several angles
- Any seam locations marked on the template
If cabinets are not ready, for example if they are not level or fully secured, photograph the issue and record what was communicated to the customer or contractor. That record shows the problem was identified before fabrication.
Stage 3: Slab selection and layout approval
Natural stone and engineered surfaces vary, and approval is a common source of disagreement.
- The full face of each slab, shot straight on with even lighting
- Close-ups of veining, flecks, or patterns that affect the layout
- Defects, fissures, or pits and how they relate to the layout
- The slab identifier or lot number, with the label visible
- The layout overlay, showing where each piece will be cut and where seams will fall
- Any customer sign-off on the layout, saved with the job
Consistent lighting makes a large difference. A photo taken in a dim warehouse can make a stone look very different from how it will look in a bright kitchen. Note the conditions when you photograph, and avoid heavy filters or editing.
Stage 4: Fabrication
In-house photos are often overlooked, but they are valuable when damage questions arise.
- The cut pieces laid out in order, with seams and edges visible
- Sink and cooktop cutouts, showing radius corners and the surrounding stone
- Edge profiles and polishing
- Any repairs, fills, or reinforcement, before and after
- Quality checks against the template, with measurements visible
- Pieces labeled and packed for transport
These images show the condition of the pieces when they left the shop.
Stage 5: Delivery and condition on arrival
A countertop can be damaged between the shop and the kitchen. Photograph the pieces at each handoff.
- Pieces loaded and secured on the truck
- Pieces unloaded at the site, before they are carried inside
- Close-ups of corners, edges, and cutouts on arrival
- The path to the kitchen, including doorways and stairs, if access is tight
- Any visible chips or cracks, with a note describing when they were found
If a piece arrives damaged, photograph it before moving it further and record who was present. A dated, location-verified image of the damage and the delivery location matters if the cause is later disputed.
Stage 6: Installation
Installation decisions determine how the surface performs over time. Document the steps that matter.
- Cabinet tops cleaned and ready, with supports or shims in place
- Level checks across the run, with the tool in the frame
- Support for overhangs and unsupported areas
- Seam placement before joining, and the seam after it is filled and finished
- Sink and cooktop areas, including how the opening was supported
- Adhesive, sealant, and fasteners used
- Pieces set in place before any final adjustments
These photos show how the surface was supported and installed, which is exactly what a manufacturer or customer will ask about if a crack or movement appears later.
Stage 7: Completion and walkthrough
Finish with a complete record of the installed result.
- Each countertop run from the same positions used in the before photos
- Close-ups of seams, edges, corners, and cutouts
- The backsplash junction and gaps along the wall
- Sink and faucet area, including any plumbing connections visible
- Sealing and finishing, where applicable
- The surrounding area, showing cabinets, floors, and walls in clean condition
- The customer walkthrough, including any items they pointed out and how they were resolved
Matching the finished shots to the first set of photos gives you clear before and after comparisons. If the customer has signed off on the finished work, include that record in the job.
Capturing Detail Without Slowing the Crew
Crews are under time pressure, and heavy slabs and tight kitchens do not leave much room for a lengthy routine. A few habits keep documentation fast.
Use a consistent photo order. Taking wide, medium, and close-up shots in the same sequence at each stage makes the record easy to review.
Show scale. Include a tape measure, a level, or a hand in close-ups, so a reviewer can see how large a seam or chip really is.
Capture the label. Slab numbers, product labels, and model numbers should be visible in at least one frame.
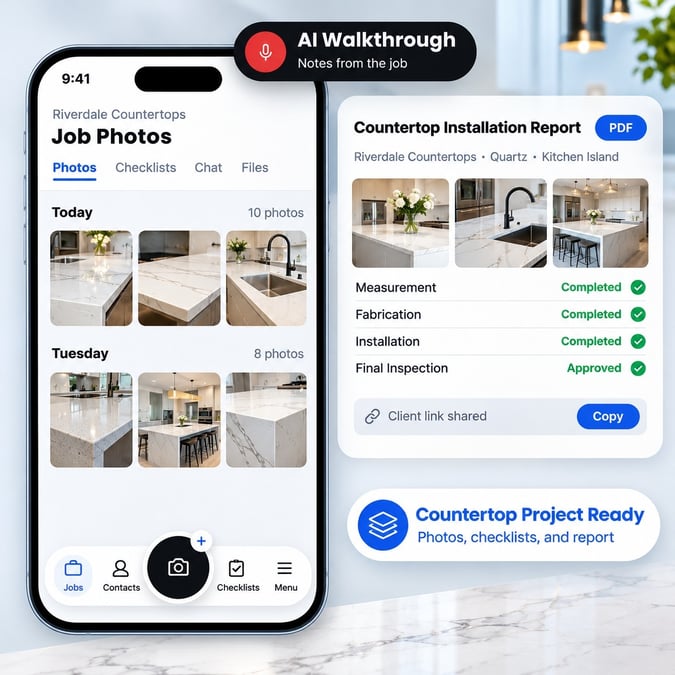
Talk instead of typing. With AI Walkthrough, installers describe what they see while taking photos, and AI turns that narration into notes on the job. A short spoken note such as “seam placed at the sink, supported underneath, filled and cleaned” replaces typing with dusty hands.
Follow a checklist. A standard photo checklist defines the required photos for a countertop job. Every crew captures the same baseline, and nothing is left to memory.
Keeping Photos Organized
A camera roll with hundreds of images from several jobs is almost as unhelpful as having no record. Organization decides whether the evidence is usable.
One job, one record. Photos should be saved to a specific job and address rather than a personal camera roll. In BlitzzCam, each job holds its photos, notes, and reports. The job photo guide shows how to create a job and capture inside it.
Tag by stage and area. Labels such as templating, slab layout, delivery, seam, or sink cutout make photos easy to find. BlitzzCam can tag photos automatically as they arrive, and you can search later by job, stage, or date.
Use the timeline. The project timeline shows the job from first visit to completion, which helps when several teams contribute at different times.
Keep the record with the company. Photos stored on a job in company cloud storage remain available when staff change or a phone is replaced.
Verified Photos Are Worth More Than Loose Photos
When a customer disputes a chip or crack, the question becomes whether the photo can be trusted. A photo without a verified date and location is easy to challenge. A photo with the time and GPS location recorded at capture is much stronger evidence of where and when the countertop was in a given condition.
BlitzzCam stamps every photo this way and files it under the right job automatically. For more on why this matters, read BlitzzCam vs. a Phone Camera: Why GPS and Timestamp Verification Matters and How BlitzzCam Protects Contractors From Damage Disputes.
Handling a Damage Claim
Even with good processes, damage happens. A clear approach keeps the conversation professional.
- Open the job record first. Review the photos from each stage before responding to the customer.
- Compare the stages. Look at the pieces at fabrication, delivery, installation, and completion to see when the issue first appears.
- Share the evidence. Send the customer a link or report showing the timeline rather than a long email.
- Correct genuine issues. If the record shows a fault on your side, address it promptly. A documented repair protects the relationship.
- Keep a record of the fix. Document the repair or replacement the same way as the original job.
For related guidance on claims, see damage and insurance claims documentation.
Working in Kitchens With Poor Signal
New builds, basements, and rural properties often have unreliable coverage. A photo app that needs a live connection can leave gaps at the worst time, such as during the final seam or the customer walkthrough.
BlitzzCam lets crews keep capturing photos without a signal, and images sync automatically once the device is back in range, with the original GPS location and timestamp preserved. See Top 10 Best Practices for Offline Construction Photo Documentation for practical tips.
Turning Photos Into a Report
The record is most useful when it can be shared in a clear, organized form. After installation, build a report that includes:
- Existing conditions
- Slab selection and layout approval
- Condition on delivery
- Key installation steps and support details
- Finished photos, including seams and cutouts
- Care and sealing recommendations for the surface, if you provide them
AI reports build a report from the job’s photos, notes, and checklist results. Reports and sharing lets you send the customer, designer, or general contractor a PDF or a live link without requiring an app download or login.
Using Your Photos to Win More Work
Documentation also feeds marketing. A library of finished kitchens, organized by material and style, helps prospective customers see what is possible.
- Keep before and after images with consistent framing. Before and after photos show the change clearly
- Group finished projects by material, edge profile, or layout
- Ask customers for permission before sharing photos publicly, and avoid images that show personal items or identifying details
- Share a customer link at the end of each job, so satisfied customers can easily show friends and family
Flooring, cabinetry, and countertop teams often work in the same homes, and the same habits apply across trades. If your crews also install floors, see the BlitzzCam flooring page for how installers document subfloors, moisture tests, and finished work.
A Countertop Documentation Checklist
Use this list to build a job template.
Before work
- Kitchen overview and existing surfaces
- Cabinet and wall condition
Templating
- Cabinets, level checks, and gaps
- Sink and cooktop models
- Template in place, with seam locations
Slab and layout
- Full slab faces and close-ups
- Slab number or lot label
- Layout overlay and customer approval
Fabrication
- Cut pieces, edges, and cutouts
- Repairs or reinforcement
Delivery
- Pieces loaded and unloaded
- Corners, edges, and cutouts on arrival
Installation
- Supports, level checks, and overhangs
- Seams before and after
- Sink and cooktop areas
Completion
- Finished runs from matching positions
- Seams, edges, and cutouts, close up
- Surrounding area and customer walkthrough
Common Mistakes to Avoid
- Photographing only the finished top. The evidence that matters most is often what came before it.
- Skipping the delivery stage. Many damage claims turn on whether a piece arrived intact.
- Forgetting slab labels. Lot and slab numbers are hard to recover later.
- No scale or context in close-ups. A chip with no reference is difficult to evaluate.
- Keeping photos on personal phones. The record leaves with the crew member.
- Documenting inconsistently. A strong record on one job and none on the next weakens the standard.
- Waiting for a complaint to organize. By then, the details are harder to reconstruct.
Keeping Teams Consistent
If more than one crew works on countertops, standardization matters.
- Use the same checklist for every job type
- Require capture inside the job rather than in the native camera
- Set roles and permissions with admin controls, which provide roles, groups, and an activity log
- Review a sample of jobs each week and give quick feedback
- Connect your scheduling system so jobs flow into the photo record. See BlitzzCam integrations
To get started, see Getting Started With BlitzzCam: Setting Up Your First Project.
Start With the Next Kitchen
You do not need to overhaul your process in a day. On the next job, photograph the kitchen before work begins, the template in place, the slab with its label, the pieces on arrival, the seams and cutouts, and the finished result from matching positions. Save it all to one job and send the customer a report at the end.
Once the routine feels natural, build a checklist from it and use it on every job. Over time you will have a library of records that protects your work, answers customer questions quickly, and shows the quality of your craftsmanship.
BlitzzCam gives countertop fabricators and installers verified, organized photo documentation on every job. Start your free trial or book a demo to see how it works for your crews. Pricing details are on the pricing page.

Blitzz Team
The Blitzz Team writes about remote video support, virtual inspections and field service. Our guides come from working with home builders, property managers, warranty teams, contact centers and field service organizations that use Blitzz to see and solve issues without a truck roll.